
If you’ve upgraded your iPhone or iPad – maybe you did so over the holidays – that presents the opportunity to pass along your old devices to your children. Everyone wins! But whether it’s a child’s first phone or the latest one to grace their palms, before you hand it over, there are a few important steps you shouldn’t skip.
Simply resetting your device and hoping for the best isn’t enough. Without the right setup, these devices can expose far more than you intend. Fortunately, Apple has built in plenty of tools to help parents control what their children can access, how long they use their devices, and who they communicate with. This robust set of parental controls is designed to help you keep your child safe while still letting them enjoy their device.
Your Apple device is the key to your digital life, and there are plenty of things that you’ll want to keep locked down. At the same time, Apple has created a lot of tools for parents to manage their kids’ phones and tablets, so putting them to good use should be one of your first ports of call.
In this article, we’ll walk you through everything you need to do to turn your old iPhone or iPad into a child-friendly device that’s safe, secure, and ready to go in no time.
For guidance on the best iPhone for kids and the best iPad for kids read our buying guides.
Kid-safe iPad/iPhone setup checklist
When setting up your device for your child, it can help to have a quick checklist of things you should do. Follow these steps to ensure you don’t forget anything important. We’ll go into more detail on some of these steps later.
- Create an Apple Account for your child: This will unlock extra controls over how they use the device and make it easier to see their location.
- Enable Family Sharing: By doing this, you can share your subscriptions – Apple TV, Apple Music and more – with your child, saving you on the cost of separate memberships. You can also manage purchases. It also lets you find their phone if they lose it, restrict their screen time, and more.
- Turn on Screen Time: Speaking of restricting screen time, Apple’s appropriately named Screen Time feature allows you to define how long your child can use certain aspects of their device, ensuring they don’t spend too long glued to their phone. You can set app limits and downtime.
- Create a passcode: No one wants an unauthorized person to gain access to their child’s device and all the sensitive information it might contain. To give yourself a better chance of preventing that, set up a passcode that they know so that they can control who can unlock their phone. Better yet, set up Face ID or Touch ID as an additional layer of security.
Best parental controls settings for different ages
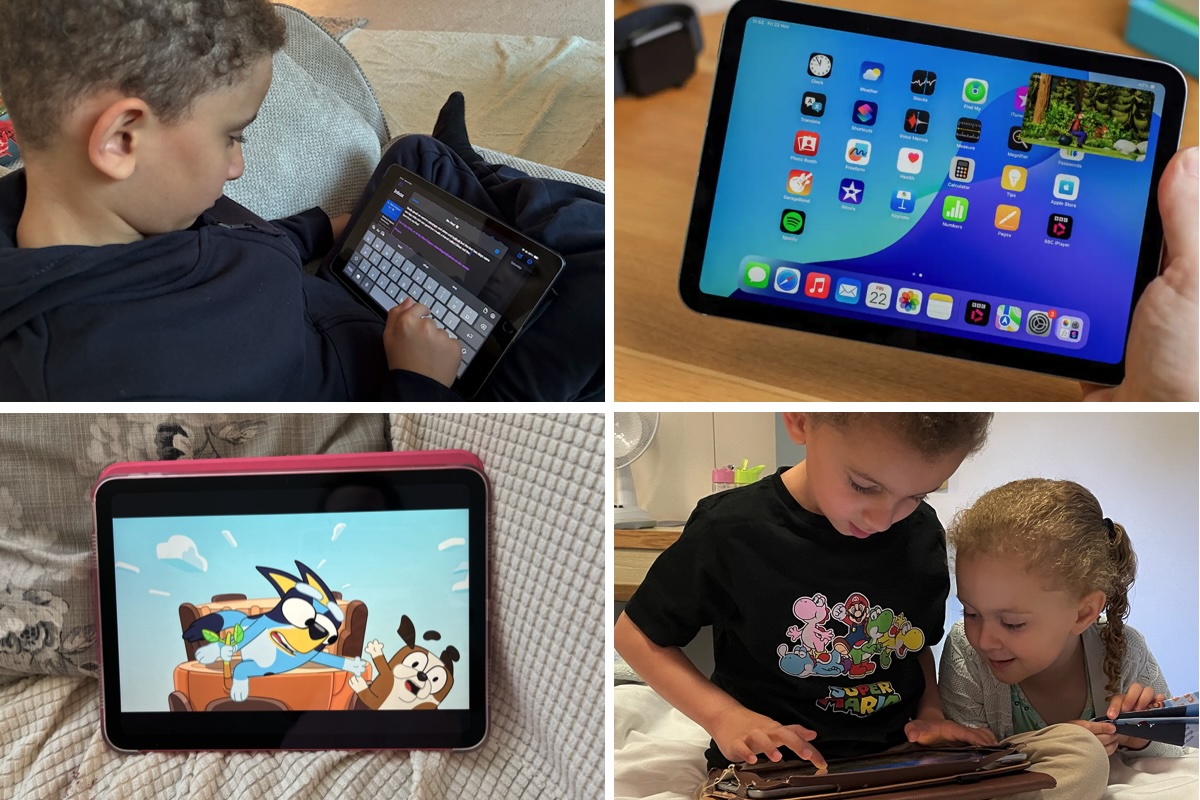
Kids love phones and tablets, you have to make sure that they are protected while using them.
Foundry
Feeling overwhelmed or not sure where to start? Here are some handy pointers to get you going based on your child’s age.
Ages 3 to 7: Under Settings > Screen Time > [Child’s Name] > Content & Privacy Restrictions > Allowed Apps & Features, block Safari and set which apps they can use. Set age limits for content under App Store, Media, Web & Games. Prevent app downloads under iTunes & App Store Purchases.
Ages 8 to 12: Allow Messages under Settings > Screen Time > [Child’s Name] > Content & Privacy Restrictions > Allowed Apps & Features. Go back to the Screen Time menu and adjust the settings under Communication Limits and Communication Safety. Head to Content & Privacy Restrictions > App Store, Media, Web & Games and set age-based web filtering restrictions. Here, under Game Center, limit who they can play games with.
Ages 13 to 17: Go to Settings > Screen Time > [Child’s Name] > App Limits > Add Limit. Select the Social category and tap Next, then choose how long they can use social media apps each day. Go back to Screen Time and tap Downtime, enable the Schedule toggle, then set a daily schedule. You can also set age-appropriate limits under Screen Time > [Child’s Name] > Content & Privacy Restrictions.
How to set up an iPhone or iPad for a child
That’s an overview of what’s involved with setting up a device. In under an hour, you can turn your old iPhone into a kid-safe device by following these steps.
Let’s go into more detail.
How to erase an iPhone or iPad before giving it to a child

Foundry
The very first thing you should do before you start setting up your device for your child is to erase it completely. That not only ensures that all your messages, photos and other private data remain out of reach, but also minimizes the risk of your account logins being used by someone who shouldn’t have access to them.
Before you start, though, it’s a good idea to back up your iPhone to either iCloud or your Mac, which could save the day if something goes wrong or you realize you accidentally erased an important file. Our guide will help you through that process.
To securely erase your iPhone or iPad follow these steps:
- Open the Settings app.
- Head to General > Transfer or Reset iPhone.
- Then select Erase All Content and Settings.
- Enter your password or Apple Account password, then follow the on-screen instructions and wait for the process to be completed.
When that’s done, your device is ready to be set up like new for your child.
How to set up Family Sharing and create an Apple Account for your child
Foundry
One of the easiest ways to remotely manage your child’s device is to use Family Sharing. This feature puts a range of tools and controls at your fingertips, allowing you to adjust what your child can do with their iPhone or iPad on the fly. Better yet, Family Sharing lets you set rules and policies for your child on your own device, which will then be automatically synced to your child’s iPhone or iPad.
To be added to Family Sharing your child will need their own Apple Account, which will also let them download apps (with the limitations you set), use shared iCloud storage, and more.
You can add a child’s Apple Account to your Family Sharing group right from their device or from your own.
To set up Family Sharing on your own device follow these steps:
- Open the Settings app and tap your name at the top of the screen.
- Go to Family > Continue and follow the prompts to create your family group and invite family members.
To create a child account to add to your Family Sharing follow these steps:
- Go to your family group (you’ll find it in Settings under your Apple ID) and tap the Add Member button in the top-right corner.
- In the Invite Family screen swipe down to Tap Create Child Account and select it. (If you have already set up the ID for your child you may see it in Suggestions).
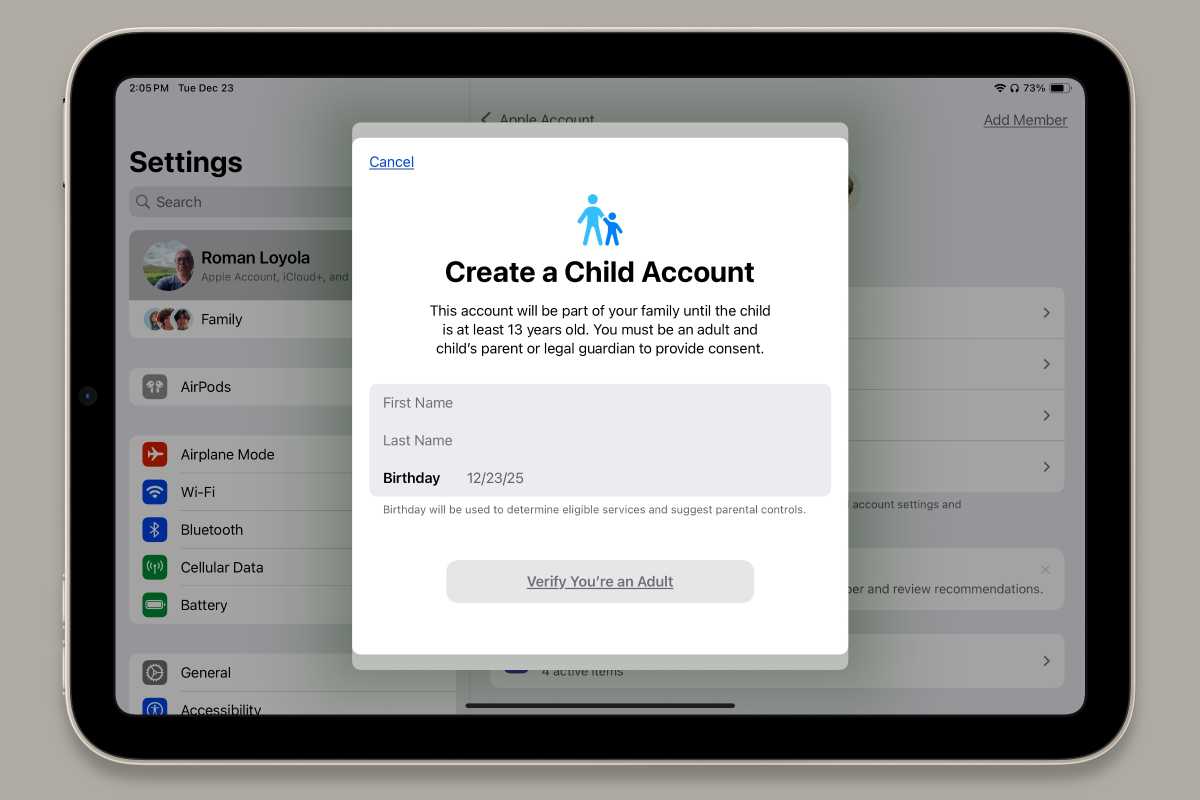
- In the Create a Child Account screen enter your child’s name and date of birth.
- You can then set up various restrictions, such as communication limits and screen distance settings, and require them to ask permission before purchasing apps, music and books.
Once your child has been added to the Family group, you can use the on-screen instructions to set up parental controls, location sharing, and more.
If you want to add a child’s Apple Account to your Family Sharing group from their device rather than from your own you can do so by following these steps:
- Open the Settings app on their iPhone or iPad and select Connect to Family.
- Follow the on-screen guidance to connect the device to your Family Sharing group – this process will also create an Apple Account for your child.
If you don’t set up an Apple Account for your child you will not be able to limit what they can do and you won’t have the ability to put restrictions on their activities.
As the family organizer in a Family Sharing group, when you purchase an eligible subscription, it can be shared with every member of your family. That means there’s no need to buy a subscription for both you and your child, saving you money in the long run. Each member can still set their own preferences and settings within apps and iOS.
One disadvantage of being the organizer is that you can end up footing the bill for purchases made by any family member if you don’t turn off turn off Purchase Sharing but note that this may mean that their purchases cannot be shared.
How to enable Screen Time on a child’s iPhone or iPad

Foundry
Screen Time is a good way to understand the ways in which you use your device (the apps you spend the most time in, for instance) and to put limits on those activities if needed. It can also be put to work monitoring and restricting a child’s account.
To get started follow these steps:
- Open the Settings app on your device and tap Screen Time.
- Select Family, then tap your child’s name.
- You’ll now see a central hub where you can control many aspects of how your child uses their device. That includes time limits for apps, age rating restrictions, communication safety policies, and more.
- Explore all these options to make sure you’re happy with how their device is set up. Any changes you make will be synced to your child’s device.
Certain Screen Time settings – like requiring your child to get permission to make purchases – might lead to prompts on your device from time to time. That’s because your child can ask for an exception to the general rule when they reach a pre-set limit. You can respond to this request on their device (with a pincode) or on your own.
How to manage a child’s privacy and location services
Foundry
Granting access to the location of your child’s device is a tricky subject. On the one hand, many parents will feel it’s vital to know where their child is so they know that they’re safe. On the other hand, you might not feel comfortable granting location access to certain apps that might not use that information scrupulously. That often means you’ll want to take a nuanced approach to location data when preparing an old iPhone or iPad for your child.
First, we’ll start with how you can keep track of your child’s location using their device. When you first create a child account using Family Sharing, you’ll be able to share their location with every person who has been added to your Family Sharing group. This setting will also help pinpoint their device using the Find My app.
To adjust these settings later, go to Settings > Family > Location Sharing and change the toggles as required.
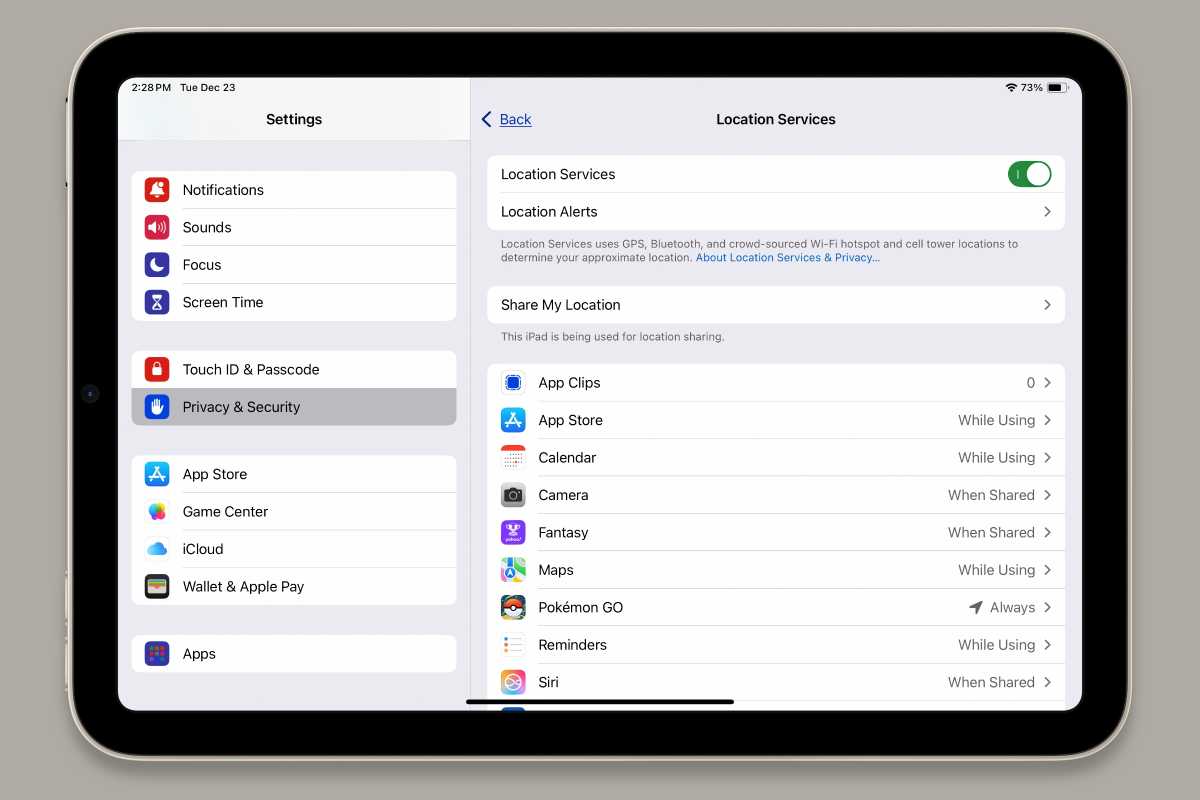
If you want to limit which apps have access to the location of your child’s device, you’ll need to open the Settings app on their device and go to Privacy & Security > Location Services. Here, you can turn off location services for all apps and features or go through each app and change the location permissions individually.
Note that if you switch off all location services, you won’t be able to trace your child’s lost devices using Find My.
How to set content and privacy restrictions for a child
Foundry
There are a lot more content and privacy settings you can customize to ensure everything is appropriate for your child. Make the following changes on your child’s device rather than your own:
To start, head to the Privacy & Security section of the Settings app and tap Tracking, then disable the toggle next to Allow Apps to Request to Track. This will stop any apps that your child downloads from being able to follow them across the web and other apps.
Now go back and scroll down to Sensitive Content Warning. Enable the toggle here to block nude photos and videos before they are viewed on your child’s device.
Screen Time is a very useful tool when it comes to preventing inappropriate content from reaching your child – it’s not just about how long they can use their iPad for.
To start, open Settings and go to Screen Time, then tap your child’s name under Family. Tap Content & Privacy Restrictions and enable the toggle at the top next to Content & Privacy Restrictions.
The Content & Privacy Restrictions section is a goldmine of settings that can help protect your child. The first area is used to manage how they interact with apps and features like Apple Intelligence.
- Tap iTunes & App Store Purchases to decide whether your child can install apps and buy in-app purchases;
- Allowed Apps & Features lets you disable certain features (like the camera) or apps that you don’t want your child to access.
The App Store, Media, Web & Games section is where you’ll find age-related controls:
- Tap Movies or TV Shows, for instance, and select U to ensure your child can only watch U-rated content.
- Similarly, the Books, Apps and Music, Podcasts, News, and Fitness sections all let you set age ratings or restrictions on explicit content. Your child can be prevented from watching music videos and accessing App Clips, too.
- If you want to limit your child to only being able to visit certain websites, tap Web Content and choose from the list of sites (you can manually add your own URLs). In addition, there’s a menu to only allow approved websites or limit adult websites.
Note that a lot of these settings are automatically set when you first create a child account – each setting is based on your child’s age – so you don’t need to worry about settings being misconfigured so long as you set up their account with the correct date of birth. Still, it’s a good idea to review each of these sections to guarantee that everything is as you want it to be.
Final checklist: Common mistakes to avoid before you hand an iPhone/iPad to a child
There are a few last things to do before your child gets your device.
Remove your own accounts. While it’s a great idea to create an Apple Account specifically for your kids, you shouldn’t forget to remove your own account from the phone. You can log out before erasing your device, if you like, by going to Settings > [Your Name] > Sign Out. Or you can simply go through the process of erasing your phone and you’ll be automatically logged out.
Turn off messages and photos syncing. Apple’s iCloud service can sync your messages and photos to other devices. If you’re giving your phone or tablet to your child, you might not want it to keep receiving your texts and images. First, sign out of iCloud on your old device, then go to Settings > Apps > Messages and turn off iMessage. Still on the old device, go to Settings > Apps > Photos and disable iCloud Photos, then head to Settings > Apps > FaceTime and switch off the toggle next to FaceTime. Then on your current phone or tablet, go to Settings > [Your Name], then tap the name of the device you’re giving to your child. Scroll down and tap Remove from Account.
- Don’t forget to erase the device before handing it to a child.
- Don’t leave your Apple ID signed in.
- Make sure you set up Ask to Buy.
- Don’t allow unrestricted web access.
")

